If you’re looking to record an audiobook, the microphone you use is one of the most important parts of the process of defining its quality. Even with the best narrator in the world, if you record through a low-quality mic, the audiobook will not make for great listening.
Understandably, not every production will have the budget to afford “the best” microphone, as the highest quality microphones can be very expensive. So, I’ve included mics at a range of budgets, picking out the models I think offer the best quality in their price bracket.
I’ve recorded a lot of audiobooks and similar vocal content in my time as an audio engineer, and in my experience, all of these mics are worthy of their price tags. I’ll also share key factors to consider to help you choose your mic and a bunch of tips relating to mic technique!
Best Microphones for Recording Audiobooks
There are thousands of microphone models out there, from the cheap and nasty to reliable workhorses to stunning, state-of-the-art masterpieces.
This list of microphones shows the best for each budget range. There is no single “best” mic because each has its own advantages and suitabilities. These offer the best value for money and performance.
Some of these mics are XLR, meaning you need an audio interface, and others are USB – which have an interface built in. This is explained in more detail below the microphone reviews.
Neumann U 87 AI
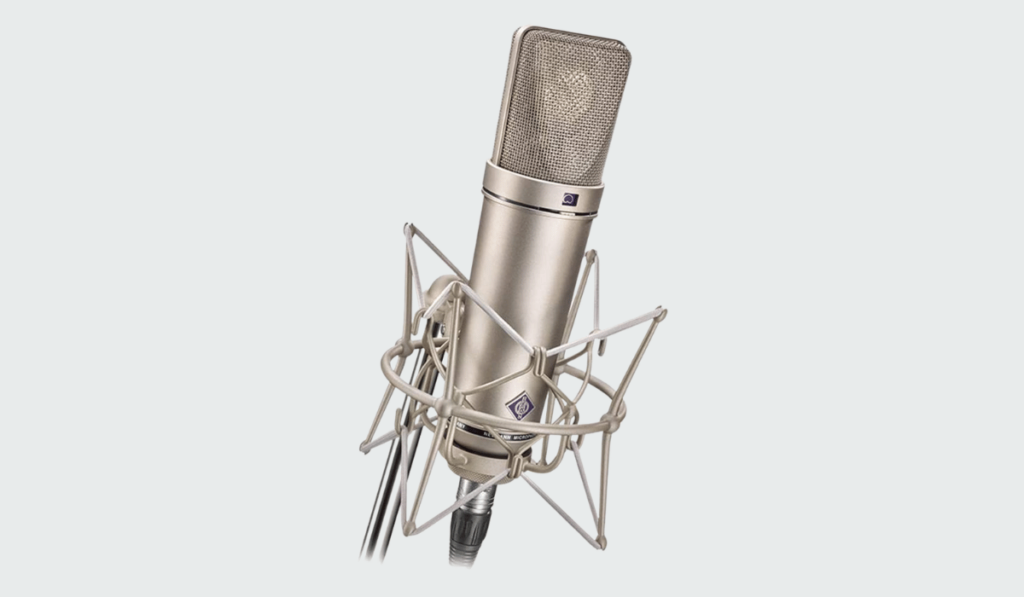
If you have a large budget, the Neumann U87 is by far one of the best-sounding microphones to record an audiobook with.
This is a large diaphragm condenser with three different pattern settings – omnidirectional, cardioid, and figure 8. Thanks to the incredibly well-engineered large diaphragm capsule, this mic records audio in a stunning level of detail.
Recordings made with this mic sound as close to real life as it comes. When monitoring through good speakers, you’ll probably forget that you’re listening to a recording, and your ears will be deceived that the narrator is in the room with you.
This is the best choice for professional situations with big budgets. It’s worth considering that you’ll need an audio interface, and recording studio of matching quality to get the best out of this mic too.
These mics record in such high detail that you’ll need to use them in equally perfect acoustic conditions. Sure, using a top-end mic will get you a great sound, but it will also highlight any issues with your sonic environment.
There really isn’t anything to fault with the design and quality of the mic. The only real downside is the price.
Pros
- Unmatched quality
- Switchable polar pattern
- Unique and natural sound
Cons
- Expensive
- Need gear and room with matching quality
Electrolux RE20
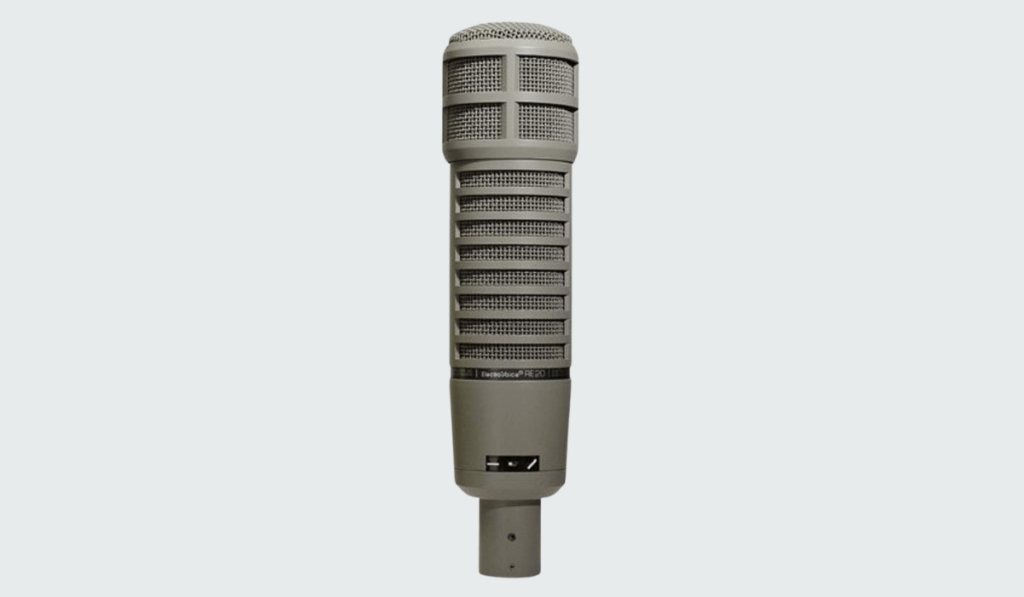
This dynamic cardioid microphone offers one of my favorite vocal tones of all microphones. It has a thick, rich frequency balance that captures the full body and weight of a vocal recording.
Unlike other mics that tend to have an overly bright tone, I find the RE20 to be perfectly balanced. Using a dynamic capsule design, you get natural and controlled sound, while the internal element shock mount reduces unwanted vibrations from the local environment.
The hard steel case and hum-bucking coil provide exceptional magnetic shielding which both contribute to a clean, undisturbed tone. The mic uses a cardioid pattern, which is perfect for vocals, although does restrict its performance for other recording tasks.
While this is a dynamic mic, it does come close to the performance of condensers thanks to the large diaphragm that offers plenty of detail.
This mic is ideal for audiobooks, podcasts, and other vocal-based recording tasks. It’s widely recognized across the industry as a go-to vocal mic since its release in 1968.
Pros
- Warm, deep tone designed for vocals
- Industry standard for vocals and broadcast
- Excellent shielding
Cons
- Dynamic, not condenser, so has slightly less detail
- Limited polar patterns
AKG 414
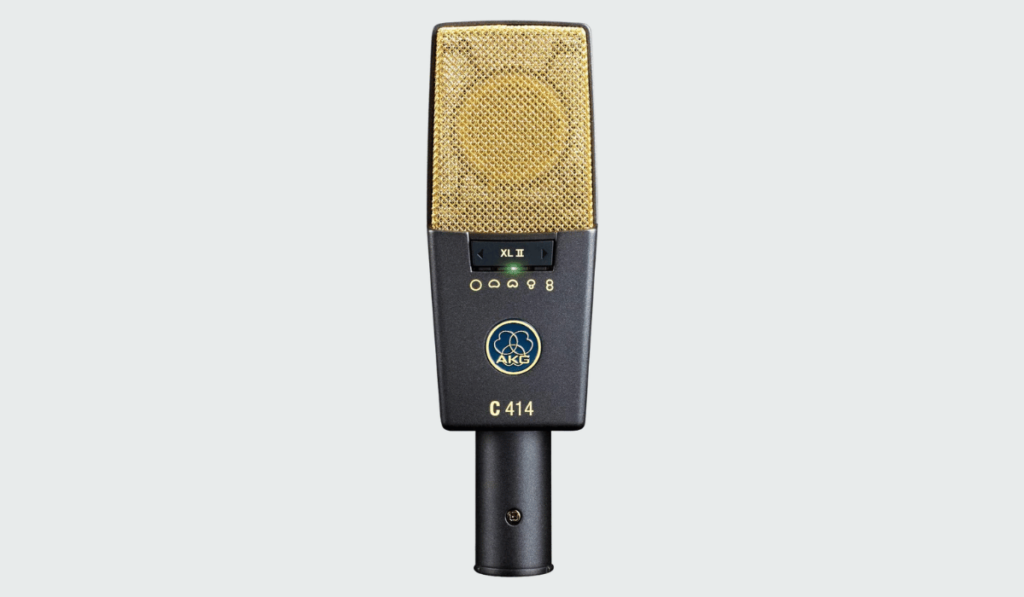
The AKG 414 is another mic that has seen widespread success in vocal recording situations. Found in pretty much every recording and TV studio, the 414 is a highly versatile, yet pristine-sounding mic.
As far as microphones go, the 414 gives you a huge amount of flexibility thanks to the controls built into the mic. It gives you a choice of 9 polar patterns, so you can tweak the recording field to fit the situation perfectly. It also has 3 different pad levels (-6/12/18db) which makes it easier to record up close without clipping the mic.
The final control is for a bass cut, with three different levels. This is particularly helpful when recording vocals as you can mitigate an excess of plosives and bass frequencies which occur when close-micing a mouth.
Thanks to all these controls, this mic can achieve a range of different sounds. Whichever way you have it tuned the 414 delivers clear, detailed audio that excels in any vocal situation. If you have the budget, this is one of the best microphones for recording audiobooks and other vocal-heavy tasks.
Pros
- Designed for vocals
- Highly versatile with tonnes of controls
- Reliable, high-quality sound
Cons
- Overly sensitive in some situations
- You’re paying for versatility rather than specialization.
Rode NT 1
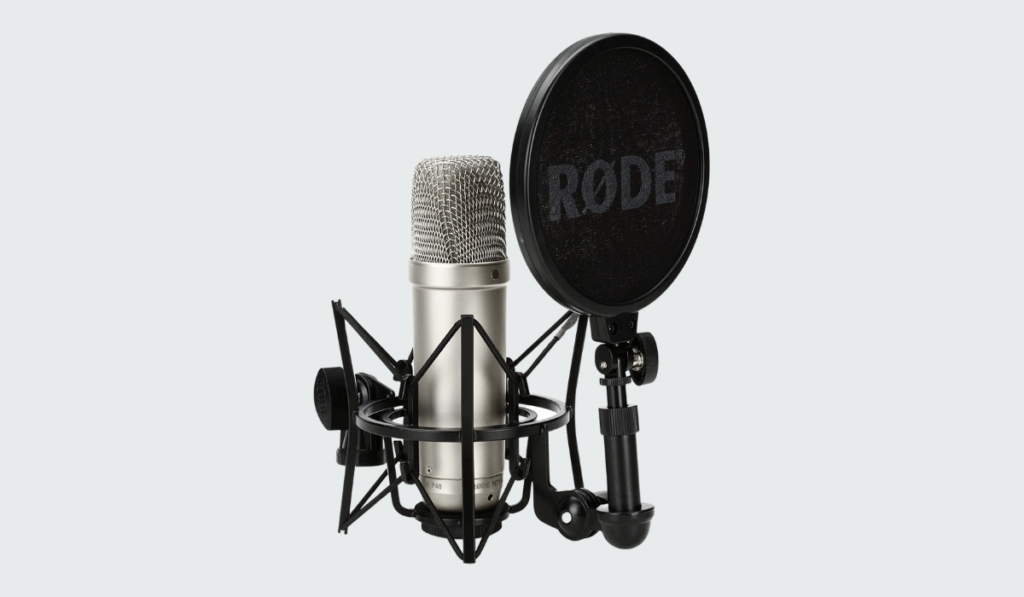
The Rode NT1 is a more budget-friendly large diaphragm condenser. This mic offers excellent audio quality at a mid-range price.
It’s designed to create a clean, clear audio signal with minimal noise and a consistent dynamic range. The NT1 has a super low noise floor, meaning the signal it records is highly accurate and undisturbed.
NT1s have been used across the industry as a vocal mic, and are found in a surprisingly large range of professional studios despite their affordable cost. These are a great entry point into pro recording, and create a high-quality tone for amateurs and professionals alike.
This condenser microphone has a frequency range of 20hz to 20khz, meaning you’ll capture the full audio spectrum in solid detail. The tone of the mic is relatively well balanced, although comparing it to more expensive models it does lack some richness in the low end
These are a good choice if you need an XLR mic that performs well in vocal recording situations, but don’t have a large budget.
Pros
- Affordable but high quality
- Clean, balanced tone
- Low noise floor
Cons
- Slightly tinny quality compared to more premium mics
Blue Snowball
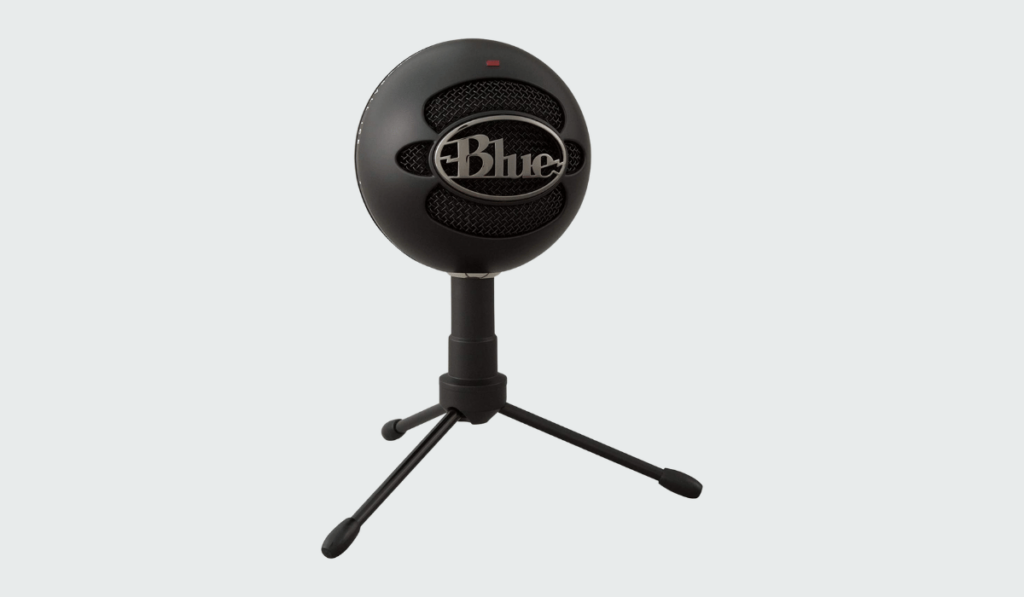
The Blue Snowball is a super affordable USB microphone that is ideal for podcast producers on a tight budget.
Sure, the Blue Snowball doesn’t have the sound quality of more expensive XLR mics, but it also won’t break the bank. Because it’s a USB mic, it has the interface built in, so you won’t need to buy any other accessories to record other than this microphone.
It features a cardioid pickup pattern which provides a focused sound with minimal background noise. The sound quality isn’t bad for the price, but it definitely doesn’t compete with professional XLR mics.
It also comes with a stand built in, which can easily be placed on a desk and is adjustable. It saves space, but it isn’t as flexible as a proper mic stand. I also think this mic looks cool too, with its unique round shape.
I will say, this is definitely only worth choosing on the tightest budgets. The design and quality are both far from perfect, and the results aren’t the most satisfying to listen to. If you are new to audiobook production and working alone, then it might be suitable.
Pros
- Very affordable
- Built-in stand
- USB plug and play
Cons
- Relatively weak audio quality
- Limited positioning due to mic
Blue Yeti
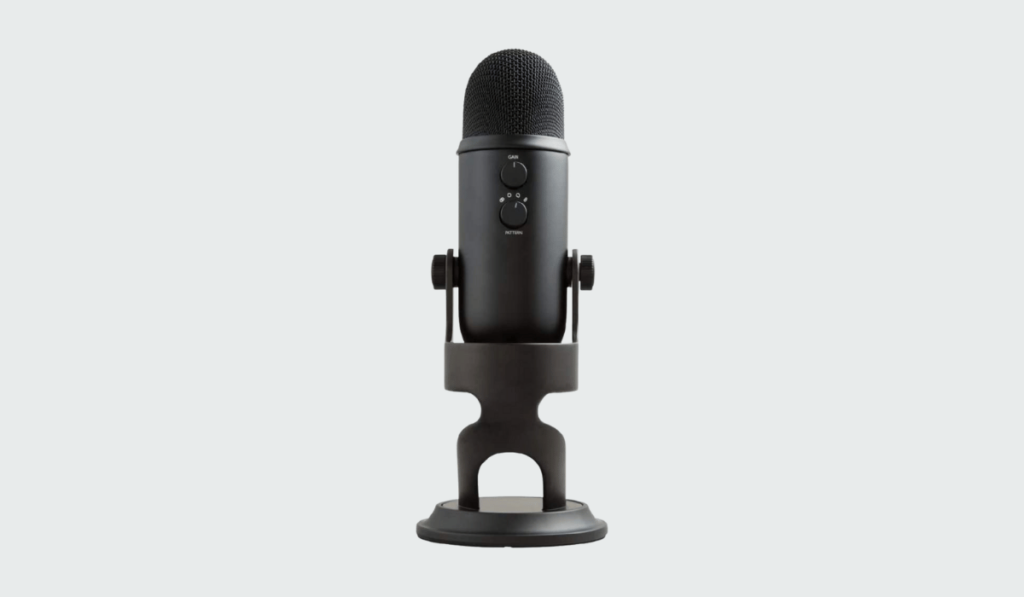
The Blue Yeti is an upgrade on the Blue Snowball and offers increased performance functionality. This mic is also USB, meaning it also works standalone and you don’t need any other gear to record your narration.
This features a larger diaphragm than the blue snowball, which gives a nice increase in detail and depth, although this mic is a little bit more expensive. The stand is also slightly more flexible, giving you a few more options when it comes to angles.
It also has three different capsules, meaning you can switch between different polar patterns. Typically, the cardioid pattern is the optimal choice for recording vocals for an audiobook, but the omnidirectional mode is also useful in other situations – for example, if you are considering recording multiple voice actors in one room simultaneously.
This mic also comes with a built-in headphone output, which makes it easy to monitor back your recordings. There are separate controls for recording volume and headphone volume, so you can quickly get the perfect monitoring balance.
This mic is more suited to amateur productions, although it does come close in quality to other professional XLR microphones. I recommend this if you are looking for something that offers better quality than the Blue Snowball, but don’t want the hassle of XLR mics and interfaces.
Pros
- USB mic – no other gear needed
- Built-in headphone and recording volume controls
Cons
- Similar in price to XLR mic setups but with less quality
Other Picks
If you are on a super tight budget, here are some other options. I won’t go into detail with these, but I recommend them if you need a low-cost mic.
How to Get the Best Results From Your Microphone
Microphone technique is an art in itself, and understanding it is the key to achieving the best-sounding audio recordings for your audiobook.
There are several factors you need to consider when setting up the microphone to record your narrator. There are also several pitfalls you need to avoid which can easily ruin your recordings.
The Distance Between the Narrator’s Mouth and The Microphone
A key phenomenon to understand is the proximity effect. In essence, the closer a microphone is placed to the source, the more exaggerated the low frequencies are. The reverse is also true, so the further away a mic is from the source, the fewer low frequencies will be captured.
Use this principle to your advantage when setting up the mic positioning. Monitor the tone of your vocal recording as you move the mic, and place it in the best-sounding place.
Reflections and Reverb
You want to minimize reverberation and get the driest recording possible. There should be no echo or reverb in the voice. This is controlled by managing the acoustics of the room – which should be as dampened as possible. Rooms can be controlled using acoustic foam and other acoustic treatments.
Narrator’s Performance
Hopefully, you should be using a skilled narrator. But mouth control is important in getting a good sound. You want to avoid mouth pops from excessive saliva. You also don’t want to wear out their voice by making them perform for too many hours in a row.
Accessories for Recording Audiobooks
Here are some accessories which make recording easier and help to achieve better sound quality.
For more detailed information you should check out my full guide on the Best Equipment For Recording an Audiobook.
What Qualities Make Good Audiobook Recordings
Here are the main audio qualities you need to think about when recording and mixing your audiobook
Dynamic Range
This is one of the most important details to get right with your recording. Dynamic range refers to the distance in loudness between the loudest and quietest parts of a recording.
You need to ensure that the recordings have consistent loudness. The last thing your listeners want to be doing is constantly turning their volume control up or down to find the right volume.
The main way to control dynamic range is with compression, which is applied after recording. Although, the use of compression can be minimized if you ensure the narrator stays at the same distance from the microphone at all times and projects their voice with a similar loudness.
Even so, no matter how skilled the narrator is, you will always need to control the dynamic range to some extent – so learn how to use compressors.
Frequency Response
Frequency response sometimes referred to as tone, refers to the balance between high, low, and mid frequencies (bass, mids, treble). Finding the sweet spot for the frequency balance of your narrator can be difficult, but it’s essential you get it right.
You want to avoid making muddy, unclear recordings – this would be the result of a lack of high frequencies, or an excess of bass.
At the same time, you also want to prevent your recordings from sounding too bright, piercing, or hissy, due to an excess of high frequencies, and an absence of lows and mids.
My tip for managing frequency response is to simply compare your recordings to a professionally released audiobook. Find an audiobook you like the tone of, and try to match the sound of your narration to theirs – easy!
No Unwanted Background Noise or Ambience
When recording vocals for audiobooks, you want to make sure there is no unwanted background noise. The listener doesn’t want to hear anything other than the narrator’s voice (unless you are intentionally adding sound effects and ambiance).
Background noise could come from anywhere. Maybe an air conditioning fan in the recording room, the sound of traffic in the background, or the hum of a computer.
Where possible, ensure that the recording environment is completely silent, other than the narrator. It’s much better to get the sound right when recording, rather than going back and fixing it in post-production.
In the unfortunate circumstance, you do make a recording with background noise, there are some software tools you can use to reduce it – such as noise reduction plugins, vocal isolators, and gates.
But, it is always better to get it right in the recording phase!
Sibilance
Sibililance refers to harsh hissing noises produced by certain letters with excessively high frequencies. The letters to watch out for here are s, z, sh, and zh – sometimes ch and j too.
These are unpleasant to listen to and can be controlled with de-esser software, or by using a pop-shield correctly.
Plosives
These are on the opposite end of the spectrum to sibilance, and create low-frequency ‘bumps’ which can disturb the ear. These letters are typically p, t, k, b, d, and g.
To avoid plosives, place the mic off-axis from the narrator’s voice. This is achieved by putting the mic at a slight sideways angle, rather than directly head-on, to the mouth.
No Distortion
This is an obvious one, but make sure that the signal is recording at a moderate level, and isn’t getting distorted. Distortion typically occurs when the interface’s gain is too high. This results in a crunchy, unpleasant tone which should be avoided at all costs.
What to Consider When Choosing an Audiobook Microphone
There are a couple of considerations to make when choosing a microphone for audiobook recording.
XLR vs USB
In the professional realm, this isn’t a debate, as XLR mics outperform USB models every time. However, if you are an amateur or working with a lower budget then you might consider the affordability and simplicity of a USB mic.
If you’re going to use an XLR mic then you’ll need an audio interface, which will eat up more of your budget.
Condenser vs Dynamic
This choice comes down to a few factors – and relates to the way the microphones capsule is made. Typically, condenser microphones are more sensitive than dynamics and offer a broader and more detailed frequency response.
Dynamics are less sensitive, but typically have more off-axis rejection, meaning less unwanted background noise and ambiance makes it into the recording.
If you are recording in ideal conditions, then a condenser will be a better choice. However, if you are working in bad acoustics or noisy environments then a dynamic might be a better choice.
How to Make an Audiobook
In case you are new to making audiobooks, here is a rough outline of the steps involved:
- Plan and budget the project.
- Choose a book and obtain the author’s permission.
- Find a narrator.
- Set up a recording environment.
- Perform a test recording.
- Record the narration.
- Edit, mix, and cut up the recorded files.
- Use a mastering process to get the audio at the right levels, dynamic range, and tone balance.
- Export the audio.
- Deliver the files to a distribution platform.
For more detailed information you should check out my full guide on How To Make An Audiobook.
Final Thoughts
Now that you’ve seen which mics are the best for recording audiobooks you’ll have no problem choosing one that suits your budget. Pair your new mic with my tips on technique and you’ll have no problems creating a professional-sounding audiobook!